Introduction:
When it comes to creating beautiful crafts using Minky fabrics, ensuring precise and straight cuts is essential. Minky Mamas takes pride in providing high-quality Minky fabrics, and to make the most of them, mastering the art of cutting fabric straight is crucial. In this guide, we'll walk you through easy-to-follow steps to achieve flawless cuts, so you can embark on your crafting journey with confidence and elevate your creations to the next level!
Step 1: Gather Your Supplies
Before you dive into cutting your Minky fabric, you’ll want to choose a place in your home that isn’t a high traffic area. Because minky fabric has long, luxurious fibers, when you cut the fabric they float in the air all over the place. Have a vacuum handy, and we recommend cutting in a room where you can shut the door to keep the fibers from drifting to another spot in the house.
You’ll also want to make sure you have the necessary tools at hand. You will need:
High-quality Minky fabric
A sharp pair of fabric scissors
A rotary cutter (optional, but highly recommended for precision)
A self-healing cutting mat
An acrylic quilting ruler
Fabric clips or pins if needed
Patience and a steady hand!
Step 2: Prepare Your Workspace
Setting up a clean, organized, and well-lit workspace is vital for accurate cuts. Lay your cutting mat on a flat surface, ensuring it's large enough to accommodate your fabric comfortably. Remove any wrinkles or creases from the Minky fabric by gently smoothing it out with your hands. If there are any creases left, we recommend washing it on cold gentle cycle and air fluffing it in the dyer (and always remember NO HEAT!).
Step 3: Align the Fabric
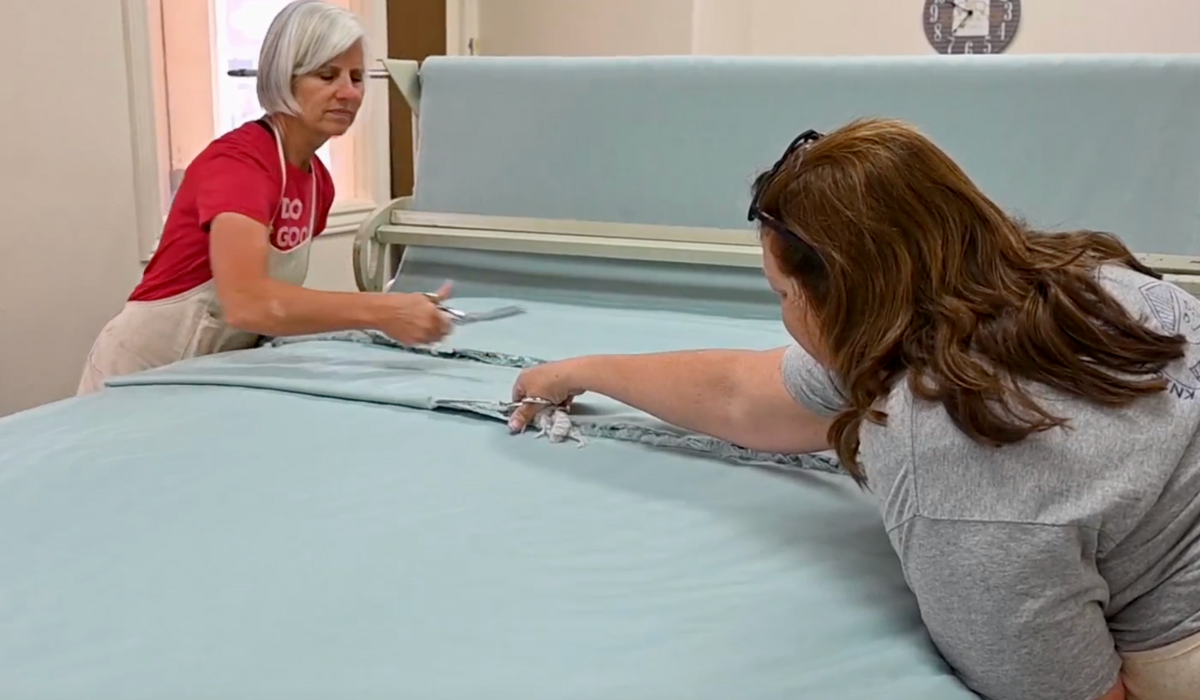
Place your Minky fabric on the cutting mat with the wrong side facing up (so the soft fibers are down and touching the mat). Make sure the edges of the fabric are straight and aligned with the lines on the mat. Use fabric clips or pins if needed to secure the fabric in place, preventing any unwanted shifting during the cutting process.
Step 4: Measure and Mark
Measure the length you need for your project and use the ruler to mark the cutting line on the fabric. If you're using a rotary cutter, place the ruler along the marked line and hold it securely to guide your cut. For scissors, draw a straight line on the fabric using a fabric pen or chalk, and ensure the line is visible and straight.
Step 5: Cut with Confidence
Now comes the actual cutting part. Take your time and maintain a steady hand as you cut along the marked line. If you're using scissors, use long, smooth strokes to achieve a clean cut. If you prefer using a rotary cutter, apply gentle pressure and let the blade do the work.
Pro tip: For even more precision, consider investing in a fabric weight or pattern weights to hold the fabric securely in place without the need for pins.
Step 6: Double Check Your Work
Once you've made your cut, take a moment to inspect it for any uneven areas or jagged edges. If needed, trim any imperfections with scissors to achieve a perfectly straight cut.
Step 7: Store Your Fabric Properly
After cutting your Minky fabric, store any leftover material by neatly folding it and placing it in airtight bags or containers. This way, you can keep your precious Minky fabrics in excellent condition for future projects.
Conclusion:
Cutting Minky fabric straight might seem intimidating at first, but with the right tools, patience, and practice, it becomes a rewarding skill that elevates your crafting projects. As a proud partner of Minky Mamas, we hope this guide helps you make the most of their high-quality Minky fabrics and inspires you to create beautiful and cozy masterpieces. So, gather your supplies, set up your workspace, and embark on your crafting journey with confidence and precision! Happy crafting!


